Converting From a Tank to a Tankless Water Heater: Step-by-Step
From free virtual estimate to final inspection: each step of a tank-to-tankless conversion, install-day timeline and how to prepare.
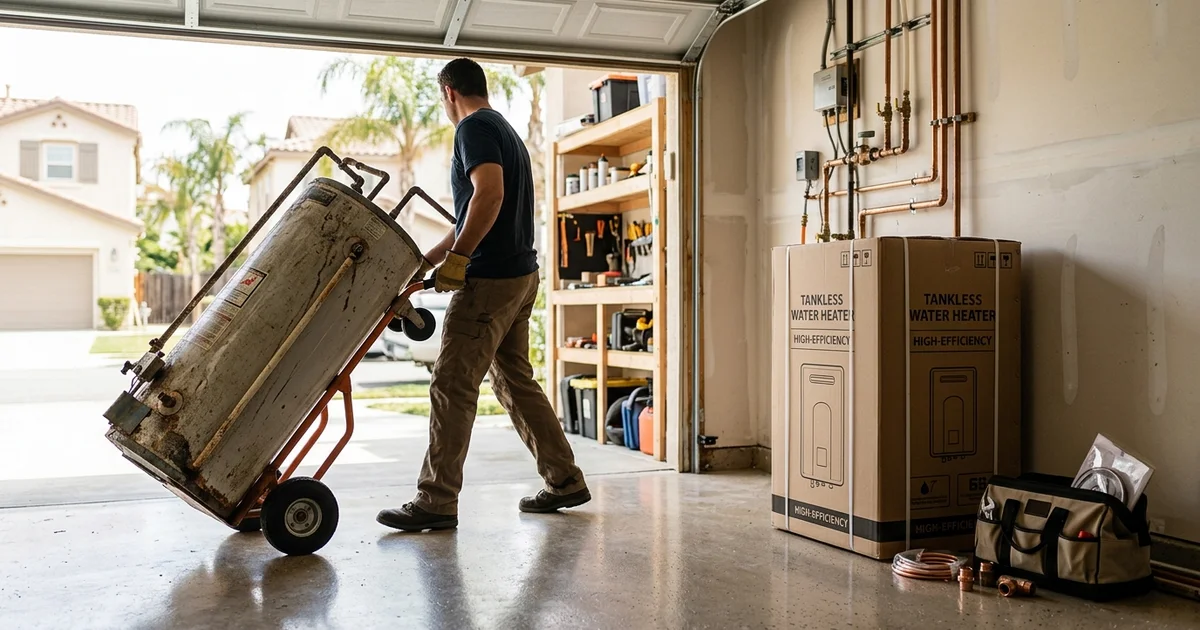
Our professional service team sees this exact scenario every week. A Southern California homeowner dealing with a failing water heater wants to upgrade to an eco-friendly system. The tank to tankless conversion process simply feels overwhelming.
That hesitation is completely normal.
Most people assume replacing a water heater with a tankless unit is just a quick hardware swap. The reality involves a few extra technical steps, like upsizing gas lines and rerouting ventilation.
We are going to break down exactly how this upgrade works and what to expect on the day of service.
Here is the complete tankless water heater installation roadmap, taking you from the first photo to the final city sign-off.
What a Tank-to-Tankless Conversion Involves
Replacing a water heater with a tankless unit requires a major infrastructure update. A standard tank runs on a 1/2-inch gas line and pulls about 40,000 BTUs per hour. Tankless systems demand up to 199,000 BTUs to heat water instantly.
Our teams must complete three main upgrades to handle this massive power increase safely:
- Gas Piping: Upgrading your plumbing to a 3/4-inch line.
- Venting: Installing specialized PVC or concentric venting to push exhaust safely through a sidewall or roof.
- Electrical: Adding a dedicated 120V outlet for the digital controls.
We handle all these technical changes during a single visit. This full conversion process typically takes six to ten hours, compared to just three hours for a basic tank swap.
Step 1: Free Virtual Estimate
Our estimate process starts before anyone even visits your home. You can send photos through the secure estimate form to get an accurate baseline. The most useful images include:
- The whole tank and the space around it
- The rating label showing the brand, model, gallons, and BTU
- The vent pipe where it leaves the tank and goes up
- The gas line and shutoff valve
- The gas meter outside
Your rating label tells a detailed story about your current setup. We look specifically at the manufacturing date and the current BTU input. Many older Bradford White or Rheem tanks from 2010 or earlier lack the necessary clearances for modern systems.
We reply during business hours with a written price range and a list of anything requiring in-person confirmation. Nobody comes out to your house until you approve this initial quote.
Step 2: In-Home Estimate and Site Check
We follow up the virtual quote with a free in-home visit to confirm the technical details. Photos cannot measure the exact gas pressure or the physical distance from your meter. Our technicians review several critical factors during this walkthrough:
- Sizing: The crew reviews the fixtures you run at once and your likely winter inlet temperature. See what size tankless water heater you need.
- Gas: We measure the run from the meter, check other appliances on the line, and confirm meter capacity. See tankless gas line size.
- Venting: Installers plan the vent route and termination location. See tankless venting explained.
- Mounting location: Garage wall, utility closet, or exterior wall.
- Local rules: HOA guidelines or historic-district considerations, if any.
Southern California groundwater averages 60 to 65 degrees Fahrenheit year-round. This mild climate makes tankless units incredibly efficient, as the system requires less energy to reach your target temperature.
We calculate this specific temperature rise to select the perfect model for your square footage. You then get a finalized written quote. Once you approve it, the office schedules your install day.
Step 3: Permit
Our permit coordinators file all necessary paperwork with your local city building department before work begins. Water heater replacement requires a permit in all California cities to ensure public safety. The gas line sizing, exterior venting, and unit mounting all require formal inspection.
Most city permits in Los Angeles and Orange County cost between $150 and $400. We build this exact fee directly into your final quote so you never face hidden charges.
Step 4: Install Day
Arrival and Preparation
Our crew typically arrives between 8:00 AM and 9:00 AM to begin the conversion. Most tankless installation timeline expectations range from six to ten hours for a full retrofit. You will only be without hot water for a portion of the day.
The Installation Sequence
Here is a typical install-day sequence for a residential upgrade.
| Stage | What happens |
|---|---|
| Arrival and protection | Installers lay floor protection, confirm the plan with you, and shut off gas and water to the old heater |
| Tank removal | The crew drains the old tank, disconnects it, and hauls it away |
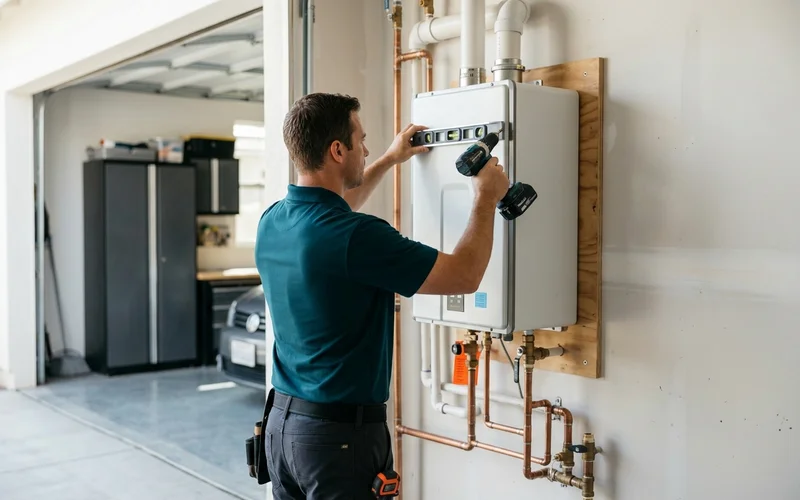
| Mounting | The tankless unit is mounted level on the wall with proper clearances |
| Gas work | We run a new gas line or upsize it as needed, with an appliance shutoff valve and sediment trap |
| Venting | Installers seal a new vent, and the old flue is capped or removed as code requires |
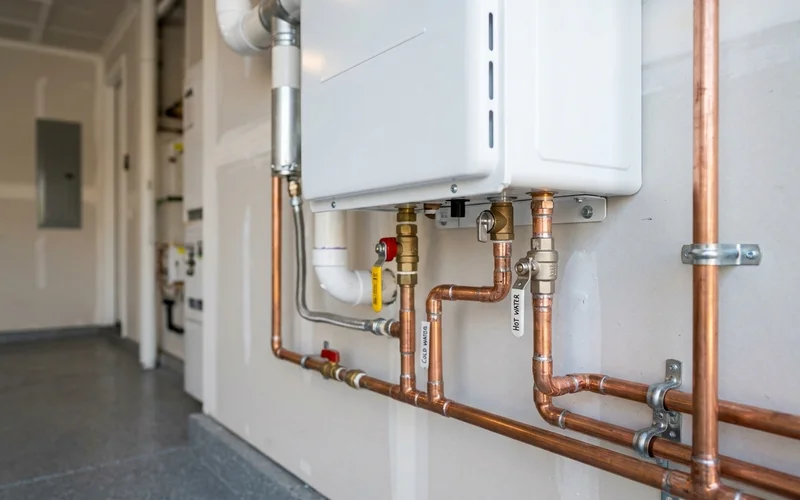
| Water connections | We add cold and hot connections with isolation service valves for future flushing, plus a pressure relief valve |
| Condensate drain | A drain line and neutralizer are installed for condensing units |
| Electrical | The unit is plugged into a nearby outlet, or a new outlet is added if none exists |
| Startup | Our team purges air, lights the unit, tests gas pressure and flow, and checks every joint for leaks |
| Walkthrough | You learn the controls, set the temperature, and hear about maintenance |
You will only be without hot water for part of the day
Hot water is off from when the crew drains the old tank until the new unit starts up. On a typical install, that covers roughly four to six hours of the working day.
Step 5: Startup, Testing and Warranty Registration
We run a comprehensive series of safety checks before packing up our tools. The technicians perform several critical tests to ensure everything operates perfectly:
- Testing the dynamic gas pressure at the unit under a heavy load so the burner fires correctly.
- Running water at multiple fixtures simultaneously to confirm steady flow and temperature.
- Verifying the exterior vent terminal and soap-testing every single water and gas joint for microscopic leaks.
Modern condensing systems require this precise calibration to run efficiently. We then register the manufacturer warranty on your behalf.
Your final paperwork packet contains the paid invoice, the contractor license number, and the unit serial numbers. You will need these specific documents to claim 2026 local rebates through programs like SoCalGas or TECH Clean California.
Step 6: City Inspection
The city inspector visits your home a few days after the install is complete. They review the dedicated gas line, the Title 24 energy venting compliance, and the mandatory gas sediment trap.
Our team meets the inspector in person so you never have to answer technical plumbing questions. Once the inspector signs the permit card, your project officially concludes.
The California code requirements guide explains exactly what these officials look for during their visit.
How to Prepare for Install Day
A little proactive preparation makes the entire process run much smoother. You can help the crew by tackling a few basic items before they arrive.
- Clear the area. Move stored boxes or garage items at least three feet from the tank and the planned mounting wall.
- Clear a path. The crew needs an unobstructed walkway to haul the heavy 50-gallon tank out and bring the new unit in.
- Plan around hot water. Shower the night before and run the dishwasher early in the morning.
- Secure pets. Exterior doors will remain open frequently while technicians carry large equipment and tools.
- Know where your gas meter is. Ensure the landscaping around the main exterior shutoff valve is accessible.
- Have HOA approval. Keep your approval letter handy if your association requires it for new exterior vent caps.
Our experts also recommend flushing your older showerheads a day or two after the installation. This simple tip clears out any loose sediment disturbed during the pipe conversion.
What It Costs
Most tank-to-tankless conversions run $4,500-$7,500, depending on unit size, brand, and the required infrastructure changes. A basic like-for-like tank swap costs significantly less, usually between $1,200 and $2,500.
We explain to homeowners that the $2,000 to $3,500 premium for a tankless conversion pays off over time through lower gas bills and zero standby heat loss. The detailed installation cost guide breaks down every single price driver for 2026. You can review the exact labor rates, material costs, and permit fees associated with your project.
Are you ready to start the process?
Send photos for a free virtual estimate.
We provide a transparent price range before a technician ever steps foot in your house.
Your tank to tankless conversion can be scheduled and completed faster than you think.